Thursday, February 28, 2013

Just Pics

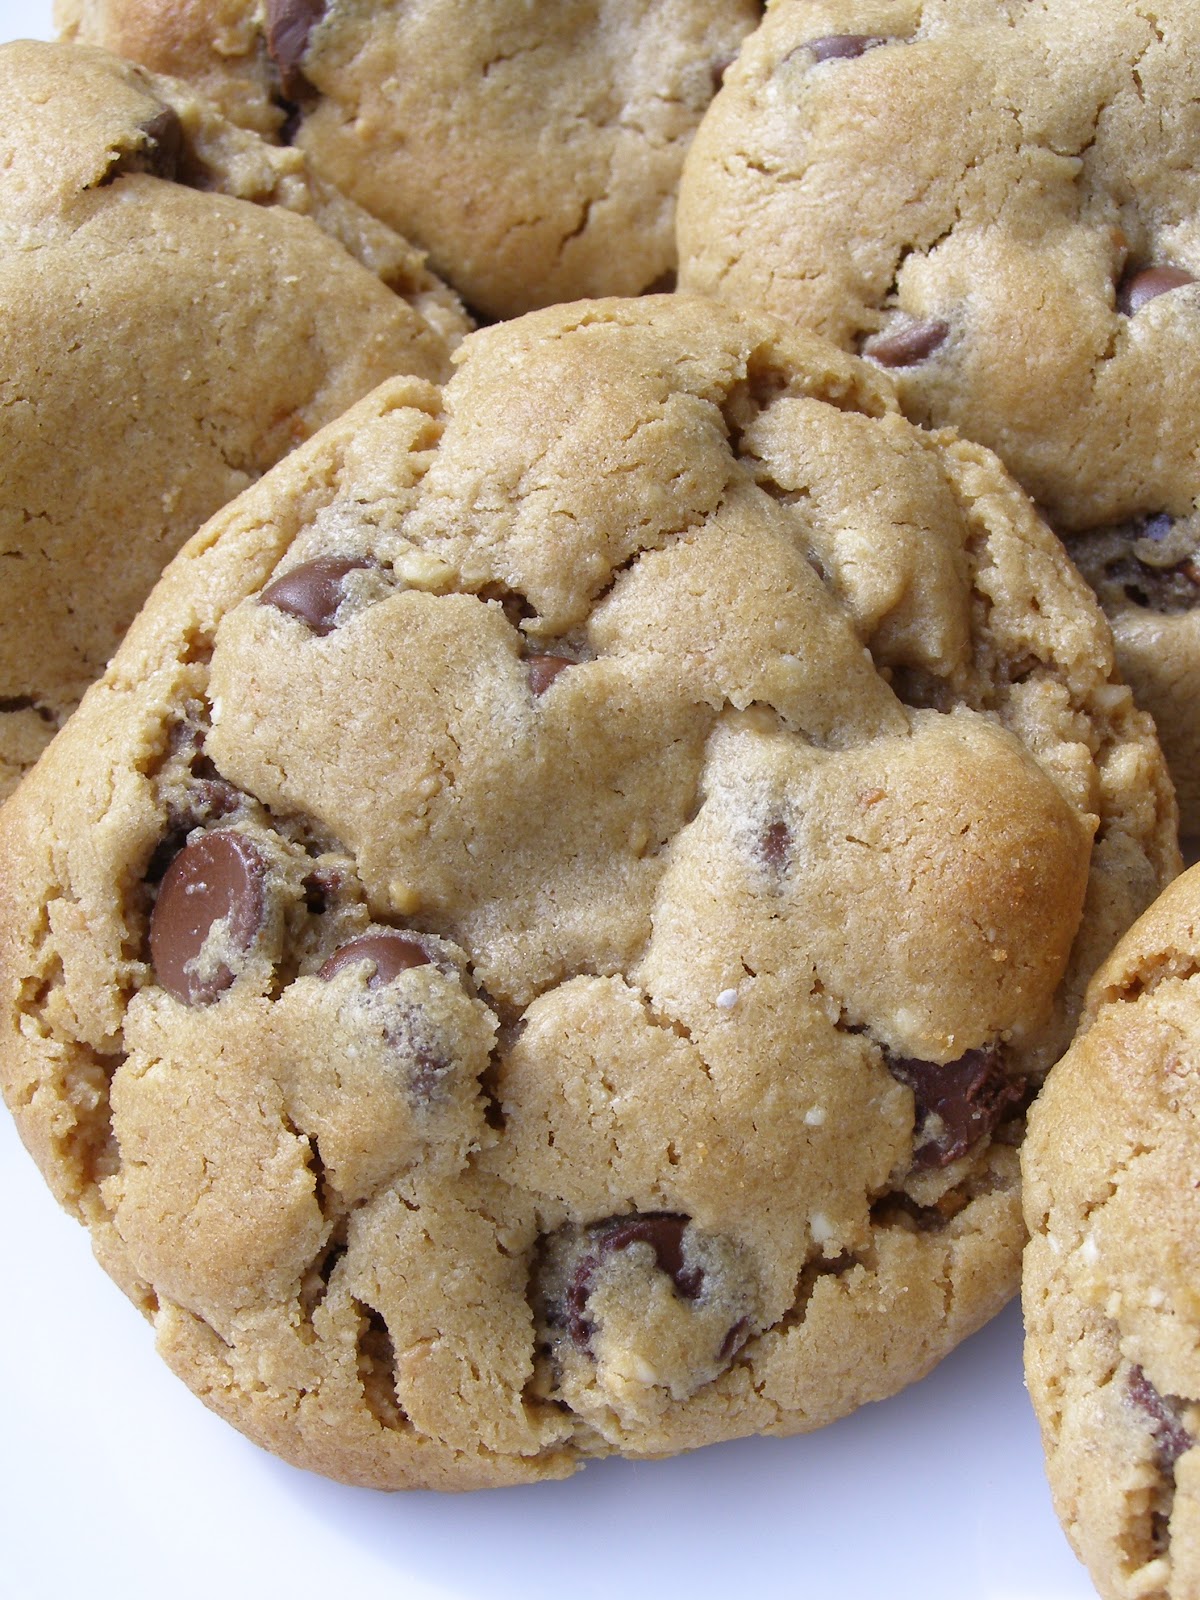
Took a bunch of photos recently. The Rice Crispies were made in a jumbo muffin tin. These Peanut Butter Choc Chip Cookies came out really nice - I left out the cocoa so the peanut flavor could shine. This Chocolate Cake is from a Cooks Illustrated recipe. It was delicious with huge chocolate flavor.

Rice Crispy Treat
Peanut Butter Choc Chip Cookie
Chocolate Cake
Chocolate Cake Slice


Wednesday, January 30, 2013

Red Carpet Dress Disintegration


I love that these days I can see the latest formal styles being worn on the red carpet right away, in full color and zoomable, with commentary. Stars are much more polished these days compared to even the 1990s. Everyone looks perfect with makeup, coiffures, manicures, with perfectly coordinated shoes, bag, jewelry and most importantly a lovely designer dress. All kinds of actresses and hollywood women young and old, fat and spindly, wear lovely evening gowns to awards shows. I love it.What I don't love, what I am confused about, is why three times now I've noticed stars having major dress malfunctions. What's going on?

Sofia Vergara : Separated Zipper
Sofia Vergara: before

Sofia Vergara: Busted Zipper
Sofia Vergara's dress's zipper has failed. This dress is very fitted, and the seat is a stress point. Usually ease is added to the seat but this dress has been tailored perhaps too tightly, removing ease. (This fabric obviously has no stretch either.) If you must have a closure at a stress point, consider a more robust one, such as hooks and eyes or a metal zipper.


Julianne Hough : Ripped at Seams
Julianne Hough: Before
Julianne Hough: Ripped at Seams
This dress has ripped at the seams between the flat textured fabric and the charmeuse. Ostensibly the dress ripped due to vigorous dancing. The only way to avoid such a failure is to add design ease (or stretch), for movement. This dress appears to have been tailored too tightly, removing ease. When having a garment fitted, be sure to sit down, climb stairs, and if you're a vigorous dancer give that a try, too. Looking good standing still isn't worth it if you look like a goof when your seams fail.
This is an interesting example of the importance of stitch length. When choosing a stitch length, choose one long enough so when you stress the fabric, the stitches break rather than the fabric ripping. This is what happened to this dress, so it is repairable.

Jennifer Lawrence : Ripped or Weird Design?
Jennifer Lawrence: Before
Jennifer Lawrence: Exposed Thighs
I don't know who to believe on this dress. In the case that a seam has ripped, it is due to the same problem as Ms. Hough. The tailoring has been too tight, and the threads have ripped out due to lack of ease.
According to Dior the design is layered and the sheer panel is supposed to appear at the thigh. Apparently the actress was holding her dress up during her speech to cover her thighs. I guess designers and personal stylists having no clue what actual women do when they wear a dress. No one predicted this Ms. Lawrence would sit down, stand up, and climb stairs (an everyday activity done often at awards shows!) and expose her thighs to her own surprise. Prevent this by testing your dress during fittings to see if there are any design surprises.

I hope this series of "wardrobe malfunctions" playing out on Twitter, Instagram, and live on TV convinces stylists and designers to consider the importance of ease and of testing movements in a design. For people who sew or wear fancy dresses, consider carefully your stitch length, choice of closure, and amount of ease.

Thursday, January 3, 2013

How to take a nice self-portrait

nice portrait, no photoshop
I don't have a glamorous lifestyle with lots of opportunity for candid portraits, so when I get bored with my profile picture, I shoot a new one. [I am not here to talk about how amazing I look in my new picture but I'm a good enough photographer and self-critic to know what looks good. I would have uploaded a no-makeup picture but they've all been deleted. Au naturale, I have uneven skin tone, acne, and unruly hair.]
Here is a quick tutorial on taking a quick seated self portrait.

Preproduction

Before we get started with the photography, take a minute to consider your grooming. Don't imagine you can photoshop flaws out later - it's easier and more honest to deal with your appearance before you shoot a frame.
  • Attend to facial hair and blemishes, moisturize skin.
  • Style hair (For me: wash, blow dry, flat iron, using setting cream and hair spray)
  • Touch up the face: For most women, at a minimum use eyeliner, powder in the center of the face, and lipcolor to offset the effect of the powder. Men should apply clear balm to the lips and use blotting papers on shine. (For me: full makeup including foundation, blush, brozer, powder, eyeshadow, eyeliner, mascara, brow fill, and lip color.)
  • Choose the right garment: a solid color is the safest bet. Don't clash with your background.
  • Accessorize: the right earrings or coat will make you feel nice without being overdressed.
Setup: You will need

  1. Digital camera with timer, flash, and tripod mount.
  2. Tripod.
  3. Plain background such as a curtain or unadorned wall.

Here is a diagram of how I set up my portraits. Men and people with thin faces may be satisfied with the camera at eye level rather than higher. Do not have the camera below your face.
Women look cuter when the camera is higher because it makes the male viewer think he's tall and masculine in comparison. Don't question the logic if you have any kind of double chin.
I shot these pictures inside on a rainy day; the only light source in these photos is on-camera flash. If you have found a nice wall outdoors you can certainly use the same setup but consider external light sources. The sun should be low or the sky overcast. All shadows on the subject and the wall must be considered.


Shooting

On most digital camera you are going to want to use two or three different setting tweaks to make this good. Take your time and shoot a lot of frames, stopping to check your framing, exposure, and expression. If your room is large you can move the camera back and zoom in. Take care to have excellent posture and experiment with different shoulder positions. Avoid the "mug shot" angle of facing the camera directly with face and shoulders.
The photo we're aiming for is a vertical or square portrait. The human face is generally a long oval so shoot with the camera positioned vertically.

Shoulders too square; Hunching
  • Use an appropriately high quality picture setting
  • Set the flash to "on," and decrease the intensity if necessary
  • Use the timer (or a remote)
  • Use the multiple-frame option, for more shots per pose
  • Consider setting the manual focus to an appropriate distance.
flash too bright


Finishing

Crop the photos of extraneous background and torso. Crop before uploading or utilize the tools of your photo service: facebook, flickr, and many other websites allow you to rotate and crop.

arm's length portraits rarely have a clear background

If you have long hair it doesn't have to all be in the frame. If you background is long, include more torso if you'd like, but full length glamour shots are a different story altogether :)

I ran across this article on babble.com: 15 Women Photographers Share Their Self-Portraits and Photo Tips. Lots of examples of different poses and types of portraits.

Love-heart Rolled Chocolate Cookies


chocolate cookies with raspberry icing

Chocolate Rolled Cookies

Ingredients

1 cup butter
2/3 cup granulated sugar
1/2 cup brown sugar
1 egg
2 Tablespoons chocolate or coffee liqueur or strong brewed coffee
1 teaspoon vanilla extract
1/2 cup cocoa powder plus extra for rolling
3 cups all purpose flour
1/2 teaspoons baking soda
1/4 teaspoon salt

Instructions
  1. Whisk together the flour, cocoa powder, baking soda and salt.  Set aside.
  2. With an electric mixer cream together the butter and sugars until fully incorporated and fluffy.
  3. Beat in egg, coffee or liqueur, and vanilla.
  4. Add in drys mixture about 1 cup at a time.  Blend until fully incorporated.  (If you are using a hand mixer you may need to add the last cup of flour by hand).
  5. Divide dough into two or three large balls, place in a plastic bag and chill in the refrigerator 1-2 hours (if you’re in a hurry, you can chill the dough for about 20 minutes in the freezer).
  6. Once chilled, work with one ball of dough at a time, and roll onto a surface lightly dusted with cocoa.
  7. Cut out desired shapes with cookie cutters and place on a baking sheet.
  8. Place the baking sheet (with cookies on it) in the freezer about 5 minutes (this helps the dough keep it’s shape when baked).
  9. Bake cookies for 7-10 minutes (depending on size) in a 350°F oven.
  10. Allow cookies to cool on baking sheet a few minutes and then transfer to a wire cooling rack.
  11. Ice with sugar cookie icing and decorate as desired.
Source: Glorious Treats
Yield: 2 dozen+
Baking Temp: 350°F

Tip: Roll out thicker than you normally would roll cookie dough, such as to 3/8".

Sugar Cookie Icing

Ingredients

2 tsp milk
2 tsp light corn syrup
1/4 tsp raspberry (or other) extract
a few drops of food dye
1 C confectioner's sugar, sifted

Instructions

  1. In a small bowl, stir sugar and milk until smooth.
  2. Stir in corn syrup, extract, and dye if doing one color. Gently stir until icing is smooth, glossy, and thick.
  3. If doing two colors, divide out into separate bowls, add dye, and stir.
  4. For method pictured, using thick icing, pipe a closed shape as an outline.
  5. Thin icing with milk until just thin enough to flood within your border. Pipe or spoon within borders, smoothing with small tool until it meets edge.
  6. Let harden at room temperature.

Tips
  • Use a coupler with a ziploc baggie. Use 2mm decorating tip.
  • Use your non-dominant hand to squeeze the bag and your dominant hand to direct the tip.
  • I have more rolled cookie tips with Polvorones de Naranja.


Aussie Meat Pie

Meat Pie with ketchup

I have been craving an Australian Meat Pie every cold winter since I've been in the U.S. Now that I have confidence in making pie I thought it was high time to find a recipe. This is an easy recipe because it is a skillet meal placed in premade dough crusts (shortcrust and phyllo). You could also do what I did and use your usual flaky pie crust for the base and top of the pie.
This is a departure from my usual post as it is a savory recipe, but that's how much I wanted to share it.

Aussie Meat Pie

Ingredients

1 tablespoon olive oil
1 large brown onion, finely chopped
1lb (500g) lean ground beef
1 tablespoon corn starch
3/4 cup beef stock
3/4 cup ketchup
2 tablespoons Worcestershire sauce
1 tablespoon barbecue sauce
1 teaspoon Vegemite
2 sheets frozen, ready-rolled shortcrust pastry, thawed
2 sheets frozen puff pastry, thawed
1 egg, beaten
Pinch pepper

Instructions
  1. Heat oil in a saucepan over medium-high heat. Add onion. Cook for 3 minutes or until soft. Add beef. Cook for 4 minutes, stirring with a wooden spoon, or until browned.
  2. Mix corn starch and 1 tablespoon of stock to form a paste. Add remaining stock. Add stock, sauces and Vegemite to mince. Bring to the boil. Reduce heat to medium-low. Simmer for 8 minutes or until thick. Cool.
  3. Preheat oven to 425°F (220°C). Place a baking tray into oven. Grease four 3" (8cm) base measurement pie pans or eight for jumbo muffins.
  4. Cut 4 x 15cm circles from shortcrust pastry. Use to line bases and sides of pans. Spoon in beef filling. Brush rims with water. Cut appropriately sized circles from puff pastry using a cup as a guide. Place over meat. Press to seal. Trim. Brush with egg. Season with pepper.
  5. Place pies onto hot tray. Bake for 20 to 25 minutes or until golden. Serve.
Tips
  • I halved this recipe and it yielded four pies made in a jumbo muffin pan.
  • Dark nonstick pans needn't be greased in this case.
  • If some of the cups of a muffin pan are empty, fill with water for even heat distribution to the food.
  • Serve with ketchup.

Original Source: Taste.com.au


Wednesday, October 10, 2012

Awesome Easy Throw Pillows

Here are some throw pillows I made for my brother, who calls them "awesome." The couch pillow inserts are feather-down and the zip-off, washable covers are a red satin brocade with gold/multi dragon/medallion design, with black satin quilt-type flange.
These were very easy to make.


Materials and Costs for Two Pillows

  • Pillow Insert from Crate & Barrel, 18x12 is $8@ +$5 shipping = $22
  • Fabric $10/yd = $10
  • Zipper $2@ = $4
  • Satin Single-Fold Blanket Binding, 4.75 yd per package = $7
  • Thread = $1

The total of these prices is $44. I do believe I got everything on sale so the costs can easily be lower.

Drafting Instructions

Using regular small paper we will draw schematics.
The pillow is Width by Height measured across the fullness. If you want ease, add it now. Sketch a rectangle labelled with the width and the height plus ease, this is your pillow front. My measurements have no ease for a crisper looking finished pillow.
Divide the width by 3, as i want the zipper one third across. We have an 18" wide pillow with no ease. 18/3=6. Our short side will be 6" wide, by the same 12" tall, this 6x12 is left back of the pillow. For right back, we subtract that 6 from the original 18, which is 12. The right back will be 12x12.
We want a zipper to connect the left back and the right back. Add 1" (or more) to the width each back piece for the zipper allowance. Our left back is now 7x12, and right back is 13x12.
Last step is adding the seam allowances. Let's make them 1/2".
That makes our Pillow Front 19x13. Our Left Back is 7.5x13. Our Right Back is 13.5x13.
Now that we have our pattern pieces, we have to decide on the pattern layout. Our fabric has a one-way design so we can't flip any rectangles to the side. What if we put all three pieces right next to each other? Yes, the widths of 19, 7.5 and 13.5 equal 40. 40 < the 44" width of fabric so there is room for that layout.
What if we make use of the selvedges? The pattern peice right back has a zipper edge on the left hand side, lets put that on the left side of fabric and the selvedge edge can be used as a finish edge, rather than finishing it some other way such as with zigzag stitching. We can put our front pattern piece next to it, and our left-hand pattern piece on the right side of the fabric again using the selvedge on the zipper seam.
Duplicate the underneath for your second pillow. The lengths of 13 for two pillows is 26. We need a piece of fabric at least 26" long if all our cuts are perfect. Rounding up for cutting errors we can get 7/8 yd (31.5") or 1 yard (36").

Cutting & Sewing Instructions

The dragon fabric is very geometric. If you trust we have a good, on-grain design to work with, I recommend you learn from my mistakes and use the design as a guide. Do not fold the fabric, cut in a single layer, right side up.
For each pillow cut one of each piece, starting with cutting a length of fabric from selvedge to selvedge that is 13" long. Then divide with vertical cuts on the left hand side our 13.5x13, 19x13 in the center, and 7.5x13 resting on the right selvedge.
Repeat for the second pillow.
Start by marking in the zipper one inch from the width on the two adjacent back pieces. Place left back and right back, right sides together, along this edge. Pin. Center the zipper vertically and mark it's length. If it's a 10" zipper then there's a 1.5" distance at top and bottom. Stitching one inch from selvedge, we want a regular stitch for 1.5" above and below the zipper with backstitching, and a basting stitch in the middle. Press open. Install zipper along this seam now, centered if you like. Finish zipper with prick stitching now, then remove basting stitches.
Our zippered back should now match up perfectly with our front piece.
As our pillows will have a flange, our seam allowances will be on the outside of the pillow, to be covered later by the satin binding.
Place the zippered back WRONG sides together with the front piece. Pin all the way around. Machine baste.
Take your satin binding, iron the package wrinkles out but leave the center fold in. We are going to make a sandwich. The binding is folded off center. Starting at one edge, laving the longer side at the back, pin the binding around the seam allowances, hiding the basting stiches. Miter the corners your preferred way; I mitered as I went. When you reach a corner, fold the binding back along itself to make the turn. Iron and pin. Make sure the raw edges at the beginning and ends are concealed by hiding within the folds of the miter.
Hand-baste or pin the mitering in place.
Working with the longer side of the binding down, stitch the binding onto the pillow with a plain stitch. Make sure to catch all of the seam allowances, the long side and the short side all. Pivot as the corners as normally.
Hand finish the mitered corners with a catch stitch.
Insert the pillows into the covers.
That's it! Good job.

Friday, September 14, 2012

Black Linen Trousers S3688


I was looking at my JoAnn app the other day and saw I had a 60% off coupon. That is the best coupon I've seen since black friday last year (when I got all my holiday gift fabric) so I hastily went shopping. I got some black swimwear fabric, because it's been impossible to find a bikini top that's remotely supportive, and I got three yards of 100% linen in black.
I'm a big believer in linen for the summer months. I'm generally a fan of natural fibers; synthetics have their place, but summer clothing is not it. I have two pairs of elastic-waist linen trousers from Target - the older pair is patched and the newer pair is headed in the same direction - overworn! I don't think elastic waist is the best choice for summer either, it bunches the fabric in a place you're bound to get sweaty. By summer I mean temperatures that are not a surprise when they are 100°F for a week straight. I sweat A LOT in summer, from all over my body. My face, my scalp, any creases like behind the knees, even my upper chest and lower back will sweat when I'm not even doing anything. It's awful (and gross, sorry).
So linen pants are the bomb, elastic waists are the devil, and three yards of linen for $20 is rock and roll. I already had trouser patterns I wanted to try - Simplicity 3688 and 4044. Both are from the 1940s vintage reprint line, but 4044 had a faced waistline and 3688 had a regular waistband (like the one I put on my black and white skirt).  One's waist is located at the lower edge of the 1.5" waistband in these S3688 trousers, so they're not truly high waisted.
Before cutting, I traced out the upper curves of the front piece and drafted a pocket. This took a couple of hours as I had to think out every step - like the pattern has seam allowances but if you draw any new edges you need to add them. I roughly measured the pocket dimensions on other trousers. What I did NOT do, is consider the side zipper, and paid for it later.
Do yourself a favor and ADD EXTRA SEAM ALLOWANCE for the zipper area, it makes it a lot easier to work with. you can add it all the way down the pattern piece or just for the area the zipper will sit. Either way it makes setting in a zip much easier to physically install in the seam allowance. And if you hate zippers (or... want to be more historically accurate... I thought this was a 40s pattern) you can add a button allowance instead. This is covered in the Reader's Digest sewing book. I may do this when I remake these trousers.
Construction went uneventfully until I got to the waistband. At first it looked like the waistband I cut would in no way fit around my waist, especially with a button lap. So I recut it in a better size and it turns out it's a little too big (like my black and white skirt!). Ugh. Then I notice I put the zipper lap on the wrong side (which would explain why the diagrams looked wrong). The lap part goes over, so it needs to be on the buttonhole side, which also goes over. So I reinstalled the zipper.
My final result is curved front pockets with a plain finish, with bar tacks. A centered zipper, pickstiched. I find the darts on these trousers completely adequate. I believe they flatter my rear and when I mentioned it, my husband emphatically agreed.
These trousers are 40s in the regard they have a deep crotch. Or maybe it's just me. If I were to redo this pattern in a more modern silhouette or a heavier fabric, I will remove one inch from the crotch depth (front and back). These are summer trousers and I want them as loose as possible, so I'm OK with the roomy fit.
I think the Chinese linen fabric from JoAnns is adequate, for the sale price anyway, and I look forward to making more things with linen. It takes a very high iron temperature, you can starch it to death if you have a complicated bit of stitching, and it also happily bunches up and crushes if that's what you want too. This particular linen is quite heavy, certainly a bottomweight, but I imagine it is a pleasure to work with in any weight.
I do want to make up a pair of tap pants (loose underwear shorts, or "divided slip") as it would be quite comfortable with a 40s trouser, not to mention historically accurate. Furthermore I find woven fabrics are superior in summer as they breathe much more readly than a clingy knit. Every pair of underwear I have is a stretchy knit, so I'd like to see if some silk drawers improve ventilation. I may use this pattern as a jumping off point for drawers.
Overall I think these trousers came out well. I want to remake them in a different fabric with some minor adjustments, and I think I learned some things while making them. I want to wear them which means they are a rousing success!

Thursday, July 5, 2012

That looks comfy: Simplicity 2409 Jersey Top

I'm happy with how this top, Simplicity 2409 view F by Khalia Ali, came out.
Having had success with other of Khalia Ali's styles, I decided to try a short sleeved top, for summer. This view F has flutter type sleeves that are laid over a tank style bodice. Attaching the sleeves was the only difficult part of this pattern. It is an overlay so you just have to think it through carefully. The center of the bodice is separated from the sides on a long seam located close to the bust point; it is on that seam that the flutter piece is added like cheese in a sandwich. Once I figured all that out, the rest went pretty smoothly.
I do recommend you get a ball point needle if you do this project in a knit. After I did this garment I did one more thing in a knit, but with a ball point needle in the machine, and it went much more smoothly. The only seam that I had trouble with on this top was the long lower hem. Could have a better finish.
Also don't forget for this view there is a bias binding neckline. I made my own bias strips from a nice coral colored linen scrap I had lying about. If you use a solid colored fabric for the garment you could really bring in something interesting to your neckline if you wanted, such as a contrast solid or a print.
In the future I will remake this top, as jersey fabric comes to me. I also would remake this but add a lower panel, to make a "maxi" (long) dress.
I don't wish to dwell on how my figure illustrates this, but this pattern is a "suitable for maternity" (i.e., pregnant women). There's a few versions of the tops, they all have an empire line, and you could modify it to a dress. For the spring/summer pregnancy, this would be a real favorite for casual wear. You could also make this up and not have to worry about how much bigger your bump gets, because any size is accommodated, and wear it after the pregnancy as the bump fades away. This pattern is available in regular women's sizes as well as plus.
What I did with this top is not fully enclose my elastic (at the underbust). The casing is completed most of the way around, but instead of stitching together my elastic ends, I tied them, and left the whole knot out of the stitching. That way I can replace the elastic if it gets ruined in the wash, or retie it shorter if the top becomes too big. This is an idea for you pregnant ladies! The only concern you'd have as your pregnancy develops is keeping an eye on your lower hem. You could start with an unfinished, even hem that is a little long, and modify it later with a hand stitched hem so the front doesn't look like it is too high in the front, and finally let it back out after the pregnancy. Just an idea.
Whatever the status of your uterus, bear in mind that if you are short (and/or your fabric is quite drapey), you will need to take some length off the hem. Obviously this top came out quite long on me, which I'm OK with. Another four inches and it's a dress, though, so if you're 5'2" just go ahead and modify the pattern before you cut. Unless you do want a dress in which case lucky you.
I have worn this top several times now and I always feel pretty in it. At one point I got a compliment, so that was nice. I think there are a few reasons why I like to wear it.
1. It is loose and long and drapey, and downplays any figure flaws
2. The color is very flattering to me
3. I made it, lol.
I was quite happy working with the April Johnson for Project Runway jersey fabric. There's a noticeable right and wrong side with the slub finish, but don't let that deter you. I easily found matching thread. I look forward to new fabric collections from Project Runway participants, especially ones in natural fibers.
(Fun fact: rayon is a "semi synthetic." It's made from wood, but the cellulose is obtained in a lengthy chemical process, leaving it in a grey area of not a natural fiber, and not a man-made fiber either. Rayon has quite a following, however, for it's silky hand and lovely drape in all kinds of wovens, jerseys, and blends.)

Front view

Top has bias binding at neck.

Rear view.

Monday, June 4, 2012

Draft and Sew a Sleeveless Peasant Blouse

Sleeveless peasant blouse: I like it.

A sketch of the design
I found a length of gauze (or voile?) in citrus with pastel flowers at the thrift store. It's such a light, airy weave that I decided it had to be a summer top, even if it was poly-cotton. I decided on a peasant shape as it seemed easy to execute.

an embellished blouse with elastic waist and peplum, Nordstrom
drawstring neck blouse with elastic hem, Loft

blouse with  button at back neck. Modcloth

Drafting

A foundation block with bust dart only.

moving darts

I pulled out my foundation pattern (from the yellow dress), and traced it off.

First I lowered the neckline front and back.
Then on the bodice front I drew lines from the neckline indicating the fall of a gather. Have one these lines headed toward the bust point. Cut in your neck gather lines, fold in the dart and redraw your neckline, which has spread (on new paper). Your new neckline is wider than before. Keep the center front on the grain and finish tracing off the bodice front, taking out any waist darts.

instructions
bodice gathered at neckline

For this top I wanted blousing at the waist (with elastic in casing), so calculate how much blousing (I did 2 inches but perhaps 1.5" would have been better) and lower your waistline that amount. Measure down from the waist to the length you want (mine is 6.5" below the waist). I forgot to, but add extra ease at the hip, front and back, for a bit of floatiness at the lower hem. Then I redrew the side seam, bust down to hem (rather than following the instructions...). Give your back bodice the same length side seam as the front. Last of course, add all your seam allowances.

shaping the blouson
blouson bodice diagram

Measure the length of the front and back pattern pieces, added together this is your yardage as both will be cut on the fold.
tucked in

Materials

1 7/8 yards (44" width) Lightweight fabric for garment and self-bias tape, 1/2"
1/8" elastic for front neckline
1/4" elastic for waistline
Thread
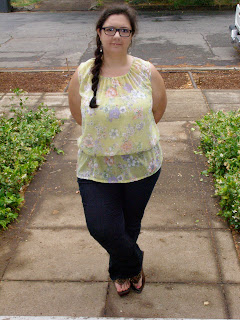
fabric is sheer

Construction

Iron your fabric in half, right sides together. Lay out your pattern, and cut each piece on the fold. Don't forget to mark the waistline and any darts.
With your scraps, make 2-3 yards of bias tape (I made half inch tape, cutting 1.25" rather than 1" strips due to the loose weave).
Start by staystitching your curved seams for the armhole and neckline.
Stitch shoulder darts if you have any.
Stitch together front and back at shoulders.
Stich side seams.
Finish and trim all these seams.
Finish armholes using bias tape using staystitching as guide.
Form narrow hem at bottom edge of garment.
Pin bias tape to outside of garment with the lower edge of tape even with the waist line. Stitch lower edge then upper edge, leaving a neat opening at one side seam (to insert elastic).
Baste garment label or hang tag at back neck.
To elasticize the front neckline only, apply neckline tape as follows:
Pin bias tape to neckline. Stop after first line of stitching (i.e. tape has been stitched onto inside of garment). Trim seam allowance. Having one inch of very narrow (1/8") elastic pointed to the back of the garment stitch the elastic (across) at one shoulder only. Pin bias tape over elastic all along the front bodice, tucking the elastic behind the seam allowances and being sure not to pin the elastic. Top stitch the tape along the front neckline being sure not to catch the elastic. pull up elastic to desired gather. (You can measure your neckline on your pattern and mark out that much elastic, pulling it up to where the mark shows.) stitch down the elastic at the shoulder seam. Trim both ends of the elastic to 1/2". Finish pinning and stitching your bias tape at the back neckline as usual.
Using a safety pin, insert 1/4" elastic into casing at waistline (either trying on for length of elastic or cutting it to your waist measure plus one inch). Check that is is not twisted. Overlap ends by one inch and stitch securely.
Last step is hand finishing: using a slip stitch, join all ends of bias tape (at each armhole, at neck, and at waist).
You're done! Good job :)
rear view

Mistakes

Forgot about blousing at waist in drafting stage so garment came out shorter than expected and forgot to widen the hemline for added ease.
May have drafted the back bodice wrong as there is too much fabric at waist back.

Cut back bodice on selvedge rather than the fold (ugh). Had to put in the flat felled seam along the center back  (it looks OK as a design element). Back neck and back bodice are subsequently 5/8" too narrow which is negligible.

Sewed in a little pinch at back neck and caused some kind of hole there also.
Stitched the shoulder seams forward (rather than the usual back) when applying the armhole bias tape.
Stitched some of the bias tape with straight rather than angled seams.
Stitched shoulder darts a little wonky; bias tape stitched on a little wavy in parts.

Suggestion: when working with a gauze or fabric that frays like this, I recommend all your seams be flat felled or otherwise encased. If the fabric is thin, seams are not bulky, and the encased nature of the seam prevents all fraying. Think ahead. Small garments or areas cannot be stitched this way but on such a large garment like this (also the PJs I made my dad), it's easy to stitch a flat felled for all seams. Now that I've worked with gauze I will encase all the seams next time.


gathered neckline

What I like & Conclusions

The style: sleeveless, pull-on shape with modest neckline and long length.
Fun printed gauze in summery colors and pattern I don't usually wear.
Length of fabric was $4.50 and I still have four yards of it.
Construction: Despite a long list of errors when you're looking at it none of them are visible; it looks fairly professional. Mike said "it's cute" when I showed it to him on the hanger.

This was a fun project that I could see myself making again.


P.S. Also had to make a layering camisole.


Wednesday, April 11, 2012

French Toast

Sundays are a good day for a hot breakfast (or brunch!). This recipe is easy to execute. Keep in mind that egg quality will make a big difference in the final outcome (and color). This particular day the toast was served with a delicous warmed marion berry jam from local company Mountain Fruit Co. Fruit compotes, thick fruit syrups, or real maple syrup are all great toppers (along with a little pat of salty butter, of course).


French Toast with Jam
French Toast
Yield: 6 slices (serves two people)
Prep time: 5 minutes
Cook time: 5-8 minutes per slice


Ingredients


2 eggs, room temperature
1/2 C cream (or milk)
1 tsp vanilla extract
1/2 tsp cinnamon (optional)
2 TB white sugar
6 slices stale french breadsalted butter for frying
2-3 TB Topping of choice


Instructions


  1. In medium dish or bowl, beat eggs, cream, vanilla, cinnamon, and sugar until smooth.
  2. Soak bread in batter, at least 30 second each side.
  3. In frying pan over low-medium temperature, fry battered bread in butter a few minutes each side until golden brown.
  4. Keep warm in low oven while preparing the rest of breakfast.
  5. Serve warm with a small pat of butter and a heated topping such as jam, thick fruit syrup, or maple syrup. You can dust with icing sugar if topping is served on the side.


Tip: Fresh french bread that goes stale overnight is the perfect bread for this. Cut slices at an angle for attractive presentation. Slices of bread can be frozen, and toasted lightly before battering for added dryness.